I am getting mine ready for installation. I thought I would share the procedures that I am taking to complete it.
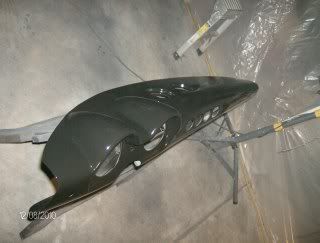
I first want to say, "This is one cool dash!" The dash I had was old. I couldn't see having to replace it every time it deteriorated. This one is made of fiberglass. It should last as long as the car.
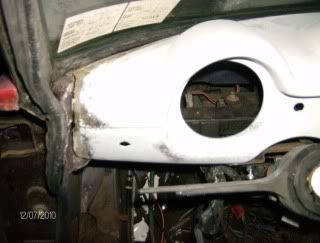
The one thing that is giving me trouble would be figuring how the dash fits inside the car. My car is completely apart. The windshield isn't on either. So I'll figure it out as I go along. I do know this dash just like the original is a little shorter than what could be in the car. Just like the original. You will either have to make some end pieces to cover ends or add fiberglass to make it a little longer. I plan on adding the fiberglass.
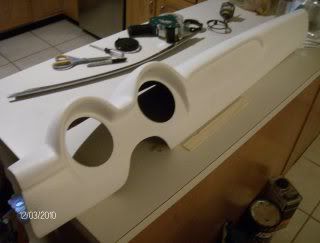
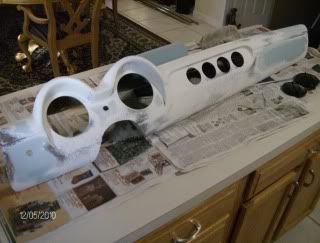
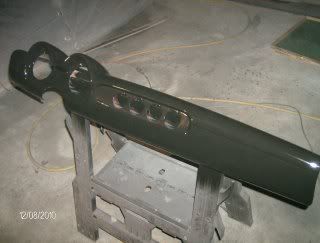
When you get the dash. It won't have any holes in it at all. I've already cut the tach and speedo holes here. I would like to share a few things I've noticed though. Just like any fiberglass part. Not all molds will be exact. On this mold, there are small circles or indentations to help you figure out where to put your gauges. Even though these are there. Make sure you want your gauges in that spot. The speedo and tack indentations were perfect on my dash. You could have four or five gauges in the center. There are only four circles in the dash now. The circles are very light and it wouldn't hurt to arrange the gauges differently. I chose to put four in my dash. When I looked at the circles on the dash. They didn't seem to be exactly spaced. So I spaced mine on my own. You will want to make sure yours are spaced correctly before drilling.
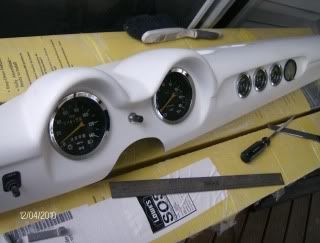
I found the center of the first and last gauge. I used a divider. (Like a compass but it has two points on the ends). I pushed in on the center to make a mark for each gauge. I then drew a line over the center marks from gauge to gauge. This is going to make sure all the gauges are straight. The hole saw I'm going to use is a 2". The hole saw that you should use for the speedo and tach should be a 3 7/8". I used a four inch and my speedo and tach almost don't cover the hole. It's close.
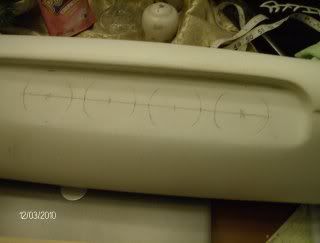
I figure I would leave a 1/2" between the gauges. Once they are in, it would have about 5/16"-3/8" gap. So you should have the distance of 7 1/2" from the center of the first gauge to the center of the last gauge. Take your divider or compass and set it on a distance of 2 1/2". Go from the first center hole and make a mark toward the center. You want to find out where the middle holes are going to be. Do the same from the last hole. Now check the distance between the two center gauges and see if its the same as the other. If it is 2 1/2". Your right on and this gives you the center marks to drill your holes.
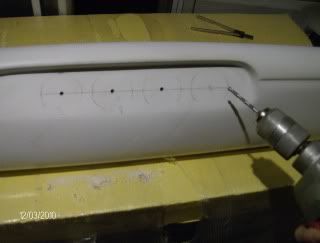
Use a drill bit that is for wood. It has a point on the end like a spade bit. This will insure you will be in the correct spot when drilling. After all the holes are drilled. Use your 2" hole saw and cut your holes. Take your time. This dash is only about a 1/8' thick in this area. Always drill a pilot hole prior to using your holes saws. You don't want to have to fix the dash.
Now that your holes are done. You will have to use a file with a rounded side to slightly make the holes larger. Take your time and file all the way around the hole evenly. You don't want to file just on one side. You'll change the distance between the holes if you do. Have your gauge ready to put in its hole just to be sure it fits. Don't use one gauge to check all the holes. Some gauges have little tabs on them to insure the gauge was put in right. For example, the clock has a tab on the top. The speedo and tach have one on the bottom. I will be painting my dash the same color as my car. So I have to take into consideration that when it is painted, the holes may be just a little smaller.
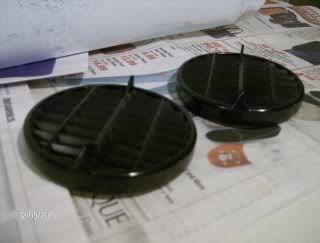
Now the fun begins. It seems the vent holes in the dash aren't perfect. By this I mean: this is a custom dash. You will be using parts from your original dash to use in this one. The vent holes are close and may need modified. Take the grill vents off your original dash unless you want to buy Ferrari grills at about $100
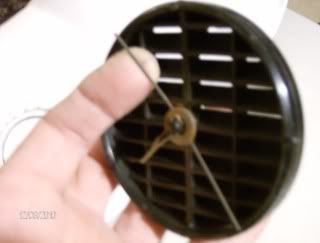
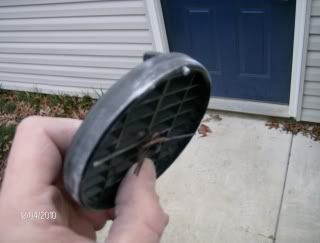
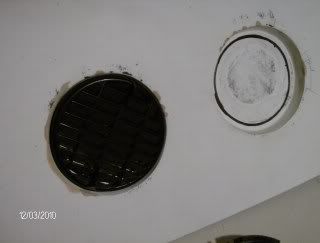
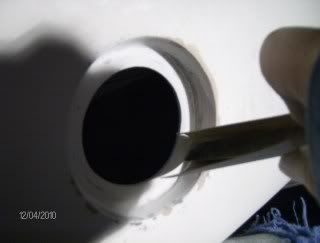
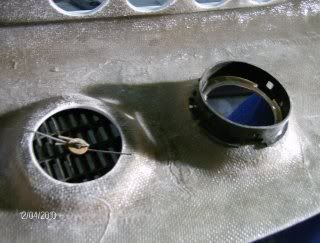
All you need is this part of the vent. It comes apart easily. Take the pin, washer, and spring off and put it in a safe place for now. Take some 220 grit sand paper and sand the sides of the grill. It has small tabs on the sides. There is one facing the bottom too. You can see it in the pic above. You want to remove it. When you sand, be careful not to sand the top of the vent. You don't want to scratch it and make it noticeable. In the pic below I used a marker to draw a circle in the vent hole. Find the center and cut a hole using your hole saw. I had a 2 1/4" hole saw lying around so I used it. I then used my rounded file to make the hole about 2 1/2" total. You can use your 2" hole saw. This stuff is very easy to file down. It took no time to do this part. Ones the tabs are removed, lay the grill in the vent hole on the dash. Check to make sure the distance around the grill are equal. See if the grill lays flat. Mine didn't. I have to take some 80 grit sand paper and sand the inside of the vent hole so the grill would lay flat. If you look at the pic with the file. It was the sides near the end of the file that needed removed. If the top looks fine around the grill. Don't sand that part.
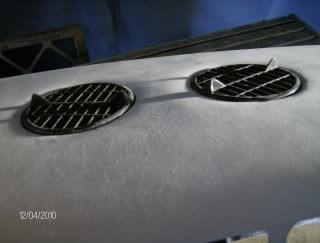
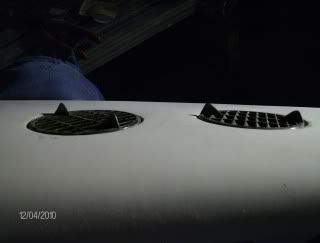
Finally the grills look good in the vent holes. It took awhile to get this right.
Since my car is apart. I don't know if anything will need done yet for the heater box to fit to this. That's to come later. If needed though. you could take the other part of the grill and epoxy it in like the vent to the right. (bottom pic)
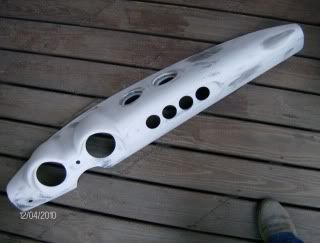
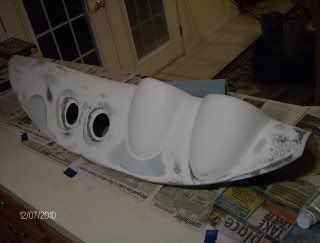
In the pic above you can see the low spots in this dash. I put some glaze on it then sanded it. The dark spots are where I have to add bondo. If I would have left it. It would have been noticeable after paint.
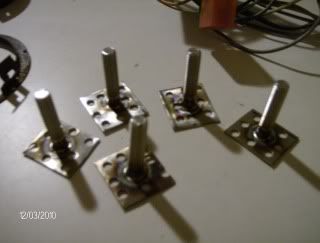
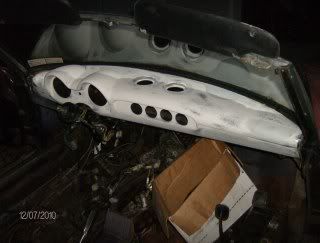
This is how I plan on connecting the dash to the car. I took some stainless bolts and steel plate. I put some holes in the plate and welded the studs on. I figure these won't rust. I'm going to fasten these to the dash using some epoxy. Two at the top and one on each end for the bottom. Some cars have three up top. I made an extra just in case I needed it.
More to come soon...