Alum Radiator Install
- courtenay
- Patron 2020

- Posts: 1321
- Joined: Mon Nov 30, 2009 11:41 pm
- Your car is a: 1980 Spider 2000
- Location: Courtenay, BC, Canada
Alum Radiator Install
Does anyone who has installed Mark's aluminum radiator have pictures of the modifications of the sway bar brackets? Also do you drill into the radiator tank to install the upper hangers? If so, do you need a gasket or some kind of sealant?
Bruce Shearer
'80 Spider Fi
'10 Volvo XC70
'06 GMC 1 Ton PU
'72 Spider a long, long time ago
'80 Spider Fi
'10 Volvo XC70
'06 GMC 1 Ton PU
'72 Spider a long, long time ago
-
cduffy
Re: Alum Radiator Install
The radiator has predrilled/tapped holes for the mounting hardware. If I remember correctly I may have had to make mounts for the bottom of the radiator and I might have had to drill the mounting hardware that came with the radiator.courtenay wrote:Does anyone who has installed Mark's aluminum radiator have pictures of the modifications of the sway bar brackets? Also do you drill into the radiator tank to install the upper hangers? If so, do you need a gasket or some kind of sealant?
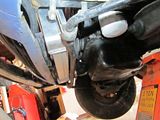
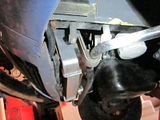
The sway bar brackes change is simply an extention that you screw on to move the brackets down a little bit. Once I have everything else done (yeah like that will ever happen) I plan on going back to this a fabricating a block to go between the frame and brackets.


- courtenay
- Patron 2020

- Posts: 1321
- Joined: Mon Nov 30, 2009 11:41 pm
- Your car is a: 1980 Spider 2000
- Location: Courtenay, BC, Canada
Re: Alum Radiator Install
Great pics - thanks so much! I really wasn't sure how the sway bar bracket thing worked but it's crystal clear now. As for the radiator mounts themselves - Doh on me!! I hadn't looked closely enough at the rad to see the predrilled holes. Dumb, dumb, dumb!!
Bruce
Bruce
Bruce Shearer
'80 Spider Fi
'10 Volvo XC70
'06 GMC 1 Ton PU
'72 Spider a long, long time ago
'80 Spider Fi
'10 Volvo XC70
'06 GMC 1 Ton PU
'72 Spider a long, long time ago
-
So Cal Mark
Re: Alum Radiator Install
You're missing the sleeves that go over the extended studs on the sway bar. The sleeves make it a very solid mount
- courtenay
- Patron 2020

- Posts: 1321
- Joined: Mon Nov 30, 2009 11:41 pm
- Your car is a: 1980 Spider 2000
- Location: Courtenay, BC, Canada
Re: Alum Radiator Install
Mark - have you got a diagram, or picture, of how all the pieces fit together?
Thanks,
Bruce
Thanks,
Bruce
Bruce Shearer
'80 Spider Fi
'10 Volvo XC70
'06 GMC 1 Ton PU
'72 Spider a long, long time ago
'80 Spider Fi
'10 Volvo XC70
'06 GMC 1 Ton PU
'72 Spider a long, long time ago
-
fillupd
- Posts: 54
- Joined: Sun Feb 20, 2011 11:23 am
- Your car is a: 1978 Fiat Spider 1800
Re: Alum Radiator Install
I don't recall the sway bar being extended that low on my '78. I made a couple of solid spacers but I think they were around a half inch or maybe a little bit better.
I'll get a pic of mine tomorrow and I think the top mounting bolt holes on the radiator were very close to being even with the top of the cross bar on top. Mines a 1978 so it may not help much. I did have to hacksaw off the lower support bracket, took about 30 seconds.
If I was going to do it again, I think I would see how much it would be to modify the lower outlet to 45 degree up towards the thermostat and maybe weld a short 90 bend on the upper one.
Don't drill into your new radiator, it will bolt up without drilling for sure.
-
So Cal Mark
Re: Alum Radiator Install
the long nuts should be threaded all of the way onto the stud in the frame, with the new stud extending downward. The sleeve slides over that stud and is captured between the sway bar bracket and unibody. When installed, you won't see the nut or stud
-
wikkid
Re: Alum Radiator Install
Mark, can you please post a link to the thread where you give information about this setup, as I can't find it on your site.
Thanks.
-Chris
Thanks.
-Chris
-
So Cal Mark

